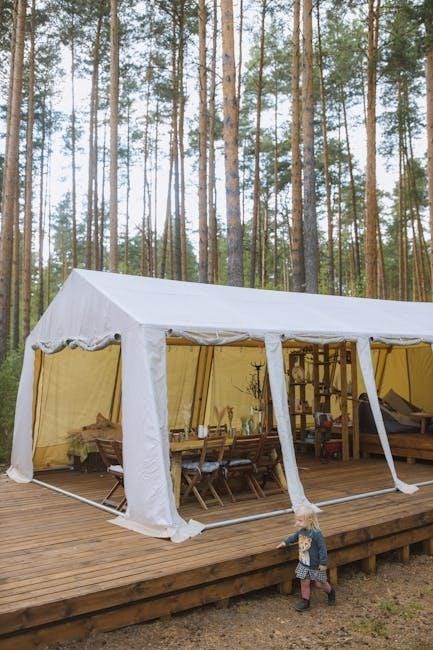
Assembling a 10×10 canopy tent is essential for ensuring stability and safety. This guide provides a step-by-step approach to help you set up your tent efficiently.
1.1 Importance of Proper Assembly
Proper assembly of a 10×10 canopy tent is crucial for ensuring safety, stability, and durability. A well-assembled structure prevents accidents, such as collapse, and protects against harsh weather conditions. Incorrect assembly can lead to loose connections, uneven surfaces, and potential damage to the fabric or frame. Following the instructions carefully ensures that all components function as intended, providing a secure and reliable shelter for outdoor events; Additionally, proper assembly extends the lifespan of the tent by preventing wear and tear from improper use. Always prioritize careful and precise assembly to guarantee a safe and enjoyable experience under your canopy.
1.2 Brief Overview of the Process
Assembling a 10×10 canopy tent involves a systematic approach to ensure a secure and functional structure. The process begins with unpacking and organizing all components, followed by constructing the frame, attaching the canopy, and securing the entire structure. Two people are typically recommended for efficient setup. Start by connecting the frame poles according to the manufacturer’s instructions, ensuring a sturdy base. Next, place the canopy atop the frame and tighten all fittings and pins to maintain tautness. Finally, stabilize the tent using ground stakes and ropes, ensuring the structure is level and firmly anchored. Proper execution of these steps guarantees a safe and durable setup for any outdoor event or gathering.
Pre-Assembly Checklist
A pre-assembly checklist ensures a smooth setup. Verify all components, check for damages, and choose a clear, level site. Gather tools and instructions beforehand.
2.1 Tools and Equipment Required
The essential tools for assembling a 10×10 canopy tent include a hammer, screwdrivers, wrenches, and Allen keys. Optional tools like a ladder or measuring tape can assist. Ensure all hardware, such as pins, bolts, and connectors, is readily available. A clean, flat surface and a team of at least two people are recommended for efficient setup. Having a well-organized toolkit and all components within reach will streamline the assembly process and minimize delays. Refer to the instruction manual for specific tools mentioned by the manufacturer to avoid missing any critical items. Proper preparation ensures a smooth and stress-free assembly experience;
2.2 Identifying All Parts and Hardware
Before starting assembly, identify all components to ensure nothing is missing or damaged. The 10×10 canopy tent typically includes frame poles, connectors, fittings, pins, and the canopy fabric. Refer to the instruction manual for a detailed parts list, often accompanied by diagrams. Many tents use color-coded or labeled parts for easier identification. Separate the hardware, such as bolts, screws, and pins, and organize them by type. Verify that all pieces are accounted for and match the inventory list provided. This step prevents confusion and delays during assembly, ensuring a smooth setup process from start to finish.
2.3 Choosing a Suitable Location
Selecting the right location is crucial for safe and effective tent assembly. Ensure the area is level, firm, and clear of debris like rocks or branches. Avoid low-lying spots to prevent water accumulation. Choose a spot away from overhead obstructions and power lines. Verify that the ground can accommodate the tent’s footprint, with adequate space for stakes and ropes. If setting up on grass, check for soft spots that might affect stability. For hard surfaces, ensure the area is clean and even. Proper site selection enhances safety, prevents damage, and ensures the tent stands securely. Always follow local regulations and safety guidelines when choosing your setup location.

Unpacking and Organizing Components
Carefully unpack all items, ensuring no damage or missing parts. Organize components by type or label, referencing the manual to confirm everything is included and accounted for.
3.1 Labeling and Categorizing Parts
Begin by labeling and categorizing all components to streamline the assembly process. Use the provided manual to identify each part, such as poles, fittings, and pins. Separate items into groups based on their function, like frame pieces, canopy attachments, and hardware. This organization ensures easy access during assembly. Place smaller parts, such as screws and pins, in designated containers to prevent loss. Lay out larger components, like tent poles, in a logical order. Cross-reference the parts list to confirm everything is included and accounted for. A well-organized workspace reduces confusion and saves time during assembly. Proper labeling and categorization are essential for a smooth setup experience.
3.2 Checking for Damages or Missing Items
Before starting assembly, thoroughly inspect all components for any signs of damage or wear. Check tent poles, fittings, and pins for bends, rust, or breaks. Examine the canopy fabric for tears, holes, or faded areas that could weaken its integrity. Ensure all hardware, including screws and bolts, is intact and accounted for. Cross-reference the parts list from the manual to verify that no items are missing. If any damage or discrepancies are found, contact the supplier immediately. Addressing these issues early prevents delays during assembly and ensures a secure, stable structure. Proper inspection is crucial for a safe and successful setup.
3.4 Ensuring All Components Are Accounted For
Before proceeding with assembly, confirm that all components are present and organized. Refer to the parts list provided in the manual to verify the inclusion of poles, fittings, pins, and canopy fabric. Organize parts by category to streamline the assembly process. Count and cross-check hardware items like screws, bolts, and connectors to ensure none are missing. If any components are missing or incomplete, contact the supplier immediately. Having all parts accounted for ensures a smooth assembly process without unnecessary delays. Proper organization and verification are critical for a successful and stress-free setup of your 10×10 canopy tent.
Assembly Process
Building the frame, attaching the canopy, and securing the structure are key steps. Follow instructions carefully to ensure a straightforward and smooth setup experience.
4.1 Building the Frame
Begin by connecting the frame poles according to the manufacturer’s instructions. Ensure all joints and fittings are secure. Start with the base poles, then move to the sides and top. Use the provided pins to lock each connection firmly. Maintain the frame’s balance to avoid misalignment. Double-check each pole’s position before proceeding. A sturdy frame is crucial for the tent’s stability and durability. Once the frame is fully assembled, you’ll be ready to attach the canopy.
4.2 Attaching the Canopy to the Frame
Once the frame is built, align the canopy with the top connectors. Secure the canopy by attaching its straps or clips to the frame’s Velcro or hooks. Ensure the fabric is evenly spread and tight. Have a second person assist to avoid sagging or uneven stretching. Tighten all straps around the frame to maintain tautness. Check the canopy for any wrinkles or sagging areas, adjusting as needed. Proper attachment ensures the tent remains stable and secure, especially in windy conditions. Make sure all edges are fully seated and fastened before proceeding to the next step.
4.3 Securing the Tent Structure
After attaching the canopy, ensure all connections are tightened to prevent shifting. Use ground stakes to anchor the frame corners, driving them into the ground at an angle for maximum stability. Secure the canopy edges with ropes tied to nearby stakes or weighted objects. Double-check all fittings and pins to ensure they are fully engaged and tightened. Make sure the frame is level and evenly balanced to prevent uneven stress on the structure. Finally, walk around the tent to verify that all parts are firmly in place and the canopy is evenly stretched. Proper securing ensures the tent remains stable and safe in various weather conditions.

Step-by-Step Instructions
Connect the frame poles securely, attach the canopy evenly, and tighten all fittings. Ensure the structure is stable and level before finalizing the setup for safe use.
5.1 Connecting the Frame Poles
Begin by connecting the main frame poles, ensuring each joint is securely fastened using the provided pins and fittings. Start with the leg poles, attaching them to the corner connectors. Next, connect the horizontal crossbars to the top of the legs, forming the base structure. Finally, attach the diagonal support poles to enhance stability. Make sure all connections are tight and properly aligned before proceeding. This step is crucial for the overall structural integrity of the tent, so take your time to ensure accuracy and safety.
5.2 Placing the Canopy on the Frame
Once the frame is fully assembled, carefully unfold the canopy fabric and ensure the labeled side faces upwards. Position the canopy evenly over the frame, aligning the corners with the leg poles. Starting from the center, stretch the fabric outward, securing it to the frame using the provided straps or clips. Make sure the canopy is tight and evenly spread to avoid wrinkles or sagging. If necessary, have someone assist to ensure proper alignment and tension. Double-check that all corners are securely attached before moving on to the next step. Proper placement ensures a smooth and professional appearance for your tent.
5.3 Tightening All Fittings and Pins
After placing the canopy on the frame, inspect all fittings and pins to ensure they are securely fastened. Use the provided tools, such as wrenches or sockets, to tighten any loose connections. Start by tightening the corner fittings first, then move to the side fittings, ensuring even tension across the canopy. Double-check that all pins are fully engaged and that the frame is stable. Properly tightened fittings prevent the tent from shifting or collapsing under wind or weight. Once all connections are secure, verify that the canopy is taut and evenly spread for optimal stability and appearance.
Stabilization and Anchoring
Ensure the tent is stabilized by inserting ground stakes into the soil, tightening ropes securely, and adjusting leg levels to maintain balance and prevent damage.
6.1 Using Ground Stakes for Stability
Ground stakes are crucial for securing your 10×10 canopy tent. Insert stakes at each corner and along the sides, ensuring they’re firmly planted at a 45-degree angle. Tighten ropes around stakes to create a taut structure. Check the ground for firmness and avoid soft or rocky areas. For added stability, use heavy-duty stakes and consider additional support in windy conditions. Proper stake placement ensures the tent remains upright and secure, preventing damage from wind or movement. Always inspect stakes before use and replace any that are bent or rusted for optimal safety and structural integrity.
6.2 Securing the Canopy with Ropes
Securing the canopy with ropes is essential for maintaining structural integrity. Attach ropes to the canopy frame and ground stakes, ensuring they are tightly wound to eliminate slack. Use rope tighteners for extra firmness, and ensure even tension across all sides. This prevents the canopy from flapping or detaching in windy conditions. Check ropes periodically for wear or looseness and adjust as needed. Properly secured ropes ensure the tent remains stable and secure, providing a safe and reliable shelter for outdoor events. Always follow the manufacturer’s guidelines for rope placement and tightening to achieve optimal stability and safety.
6.3 Ensuring the Structure Is Level
Ensuring the structure is level is crucial for the stability and safety of your 10×10 canopy tent. Use a spirit level to check the frame’s balance, starting from the base and moving upward. If the ground is uneven, adjust the leg heights by lowering or raising them until the frame is perfectly level. Secure the legs firmly with ground stakes to maintain balance. An uneven structure can lead to instability, especially in windy conditions. Double-check each corner and side to ensure uniform leveling. A level setup guarantees optimal performance and prevents potential hazards, ensuring your event remains safe and enjoyable for everyone.
Maintenance and Storage
Ensuring the structure is level is crucial for stability and safety. Use a spirit level to check balance, starting from the base and moving upward. On uneven ground, adjust leg heights to achieve evenness. Secure legs with ground stakes to maintain balance. An unbalanced structure risks instability, especially in wind. Double-check each corner and side for uniform leveling. A level setup guarantees optimal performance and prevents hazards, ensuring a safe and enjoyable event.
7.1 Cleaning the Canopy Fabric
Regular cleaning of the canopy fabric is essential to maintain its durability and appearance. Start by brushing off loose dirt or debris using a soft-bristle brush. For more thorough cleaning, mix mild soap with warm water and gently scrub the fabric using a non-abrasive sponge or cloth. Avoid using harsh chemicals, bleach, or machine washing, as these can damage the material. Rinse thoroughly with clean water to remove soap residue; Allow the fabric to air dry completely before storing it. Regular cleaning prevents mold and mildew buildup, ensuring your canopy remains in good condition for future use. Avoid using chemical treatments unless specified.
7.2 Inspecting for Damage or Wear
Regularly inspect your 10×10 canopy tent for signs of damage or wear to ensure optimal performance and longevity. Check the fabric for tears, holes, or frayed seams, which can weaken the structure. Examine the frame for rust, bending, or dents, as these can compromise stability. Inspect all hardware, such as fittings and pins, for damage or corrosion. Additionally, look for signs of mold or mildew on the fabric, which can indicate improper storage or exposure to moisture. Address any issues promptly to prevent further damage. Replace damaged parts with compatible replacements and ensure all repairs are done using the manufacturer’s recommended materials. Avoid using the tent in poor condition to maintain safety and structural integrity. Regular inspections help extend the lifespan of your canopy tent and ensure reliable performance during outdoor events. Always store the tent properly after cleaning and drying to prevent deterioration. This proactive approach saves time and money in the long run. Keep your tent in pristine condition for years of use.
7.3 Proper Storage Techniques
Proper storage is crucial for maintaining the longevity of your 10×10 canopy tent. Begin by thoroughly cleaning the fabric to remove dirt and stains, and ensure it is completely dry before storing to prevent mold or mildew. Disassemble the tent frame and store it in a protective bag or case to avoid damage. Use a sturdy storage bag for the fabric, keeping it separate from the frame to prevent creasing or tearing. Store in a cool, dry place away from direct sunlight and moisture. Avoid tight packing, as this can cause permanent wrinkles or damage. Additionally, consider labeling the storage container for easy identification. Regularly inspect stored items for signs of pests or wear. By following these steps, you can ensure your tent remains in excellent condition for future use.
Tips and Tricks
Always assemble with two people for easier handling. Ensure the area is clear of debris before setup. Use a rubber mallet to tighten fittings securely.
Regularly inspect hardware for wear and lubricate moving parts. Store components in labeled bags to streamline future assemblies. Consider practicing setup once before an event.
These tips will enhance your assembly experience and prolong the tent’s lifespan.
8.1 Avoiding Common Mistakes
One common error is incorrectly attaching poles, leading to instability. Always cross-reference parts with the manual to ensure accuracy.
Over-tightening fittings can damage threads, so apply moderate force. Never skip securing stakes, as wind can topple the structure.
Ensure the canopy is evenly spread to prevent sagging. Avoid assembling on uneven ground, as it can cause misalignment.
Forgetting to lubricate hinges may cause difficulty in disassembly. By addressing these potential pitfalls, you can achieve a sturdy and reliable setup every time. Proper preparation and attention to detail are key to a stress-free assembly process.
Regular checks during assembly help catch issues early, ensuring a safe and enjoyable experience.
Finally, always follow the manufacturer’s guidelines to maximize the tent’s durability and performance.
8.2 Optimizing Setup Time
To optimize setup time, begin by organizing all components beforehand. Labeling parts during unpacking ensures quick identification.
Assign tasks to two people for efficient teamwork, reducing effort and time.
Preassembling smaller sections, like pole connectors, can save minutes.
Use tools like Allen wrenches and rope tighteners efficiently to streamline the process.
Start by building the frame first, then attach the canopy, ensuring a logical sequence.
Avoid unnecessary adjustments by following the manual step-by-step.
Finally, practice makes perfect—familiarize yourself with the process to achieve faster assembly over time.
A well-prepared approach ensures a swift and hassle-free setup.
By minimizing delays and staying focused, you can complete the assembly efficiently.
This method ensures your tent is ready for use in the shortest time possible.
Proper planning and execution are key to a quick setup.
Save time by staying organized and following a structured approach.
This ensures your event or activity starts without unnecessary delays.
Efficient setup enhances your overall experience, making it more enjoyable.
Remember, preparation and teamwork are essential for a fast assembly.
With these tips, you can achieve a seamless and timely setup every time.
Enjoy the benefits of a well-optimized assembly process.
8.3 Enhancing Structural Integrity
To enhance the structural integrity of your 10×10 canopy tent, ensure all fittings and pins are securely tightened using tools like an Allen wrench.
Double-check that the frame is level and evenly balanced to prevent uneven stress on the poles.
Use ground stakes to anchor the tent firmly, especially in windy conditions, and ensure ropes are tightly secured.
Consider adding weight plates or sandbags for extra stability on hard surfaces.
Regularly inspect the fabric for tears or wear and repair them promptly to maintain the canopy’s strength.
Avoid over-tightening, as this can damage the frame.
Pre-assemble poles and fittings to ensure a snug fit.
Use high-quality, weather-resistant hardware to withstand outdoor conditions.
Ensure the canopy fabric is evenly spread and properly attached to the frame to prevent sagging.
By following these steps, you can significantly enhance the stability and longevity of your tent.
Regular maintenance and inspections are key to maintaining structural integrity.
Always follow the manufacturer’s guidelines for maximum weight and wind resistance.
This ensures your tent remains a safe and reliable shelter for outdoor events.

Troubleshooting Common Issues
Address common issues like loose connections, torn canopies, and misaligned frames. Tighten fittings, repair fabric with patches, and realign poles for stability and safety.
9.1 Dealing with Loose Connections
Loose connections can compromise the tent’s stability. Start by inspecting all joints and fittings for tightness. Use the provided tools to secure any bolts or screws that may have come loose during setup. Ensure that all frame poles are fully engaged and that pins are firmly in place. If a connection remains loose despite tightening, consider applying a small amount of silicone-based lubricant to reduce friction and wear. Regularly checking and tightening connections will help prevent structural issues, especially in windy conditions. Always refer to the manufacturer’s guidelines for specific tightening torque specifications to avoid over-tightening, which could damage the hardware.
9.2 Fixing Tears or Holes in the Canopy
If you notice tears or holes in the canopy, address them immediately to prevent further damage. Use a canopy repair kit, which typically includes adhesive patches and a applicator. Clean the damaged area thoroughly before applying the patch to ensure a strong bond. For larger tears, apply additional layers of adhesive for extra durability. Allow the repair to dry completely before using the tent. Avoid using harsh chemicals or abrasive cleaners, as they may weaken the fabric. Regular inspections and timely repairs will extend the canopy’s lifespan and maintain its weather resistance. Always follow the manufacturer’s repair guidelines for best results.
9.3 Addressing Frame Misalignment
If the frame becomes misaligned during assembly, stop and reassess the structure. Loosen any tightened fittings and carefully realign the poles, ensuring they fit securely into their connectors. Gently push or pull the frame sections until they align properly. Use an Allen wrench to tighten the bolts once the frame is straight. Check the entire structure for stability and make adjustments as needed. If misalignment persists, disassemble the affected section and start over, ensuring all poles and fittings are correctly matched. Always work with a partner to avoid accidents and maintain control of the frame during realignment. Proper alignment is crucial for the tent’s stability and safety.

Safety Precautions
Always maintain awareness of your surroundings during assembly. Use common sense and avoid setting up near hazards. Ensure the tent is stable and secure to prevent accidents during assembly or use.
10.1 General Safety Guidelines
Always read and follow the manufacturer’s instructions carefully. Ensure the area is clear of obstacles and debris before starting. Avoid assembling the tent in windy or wet conditions. Use protective gloves and eyewear if necessary. Never leave the tent unattended during setup. Ensure all parts are securely tightened to prevent collapse. Keep flammable materials away from the tent fabric. Be cautious of pinch points and moving parts during assembly. Assign tasks according to physical ability and expertise; Ensure proper ventilation to avoid trapping carbon monoxide from heaters. Never exceed the weight capacity of the tent. Regularly inspect the tent for wear and tear. Stay alert and use common sense throughout the process. Follow all safety rules strictly to avoid accidents and ensure a secure setup.
10.2 Weather-Related Warnings
Avoid setting up your 10×10 canopy tent in harsh weather conditions. Strong winds, heavy rain, or thunderstorms can cause structural damage or collapse. If assembling in windy conditions, ensure all stakes and ropes are securely tightened. Avoid leaving the tent unattended during bad weather. If lightning is present, stay away from the tent until the storm passes. Snow accumulation can weigh down the canopy, so clear it promptly. High temperatures can cause fabric to expand, so ensure proper ventilation. Always check the weather forecast before and during use. Never assemble or leave the tent up in extreme weather to maintain safety and prevent damage.
10.3 Emergency Disassembly
In case of an emergency, disassemble the 10×10 canopy tent quickly and safely. Start by removing the canopy from the frame to reduce weight and exposure to wind. Carefully lower the frame sections and disconnect the poles. Store all components securely to prevent damage or loss. If strong winds or rain threaten, prioritize stabilizing the structure before disassembling. Always maintain caution to avoid injury from falling parts. After disassembly, ensure all hardware and fittings are accounted for. Store the tent in a dry, protected area to prevent damage. Follow these steps to ensure safety and protect your investment during unexpected situations.
With careful planning and execution, your 10×10 canopy tent is now securely assembled, providing a durable and reliable shelter for your outdoor events and activities.
11.1 Final Check Before Use
After completing the assembly, conduct a thorough inspection to ensure all components are secure and properly aligned. Check that all poles are fully extended, fittings are tightened, and the canopy fabric is evenly spread. Verify that ground stakes are firmly secured and ropes are taut. Inspect the fabric for any tears or damage. Ensure the structure is level and stable. Double-check that all pins and connections are in place. Test the tent’s stability by gently shaking the frame. Make sure all straps and clips are tightly fastened. This final check ensures your 10×10 canopy tent is safe and ready for use, providing reliable shelter for your event.
11.2 Enjoying Your Newly Assembled Tent
With your 10×10 canopy tent successfully assembled, you can now enjoy the fruits of your labor. Whether hosting a backyard gathering, providing shade at an outdoor event, or creating a sheltered space for relaxation, your tent offers reliable protection from the sun and light rain. Take pride in knowing you’ve constructed a sturdy and functional shelter. To enhance your setup, consider adding sidewalls or decorative elements. The ease of assembly ensures you can quickly deploy your tent for any occasion, while its durability provides long-lasting use. Enjoy the convenience and versatility of your newly assembled 10×10 canopy tent, perfect for outdoor activities and events.