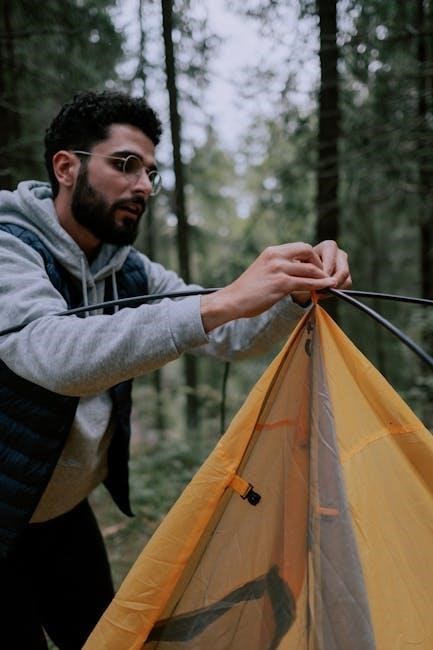
Discover the ease of setting up a durable 10×30 canopy party tent. Perfect for outdoor events, this tent offers ample space and weather protection. Follow our guide for a safe and efficient assembly process.
1.1 Overview of the 10×30 Canopy Party Tent
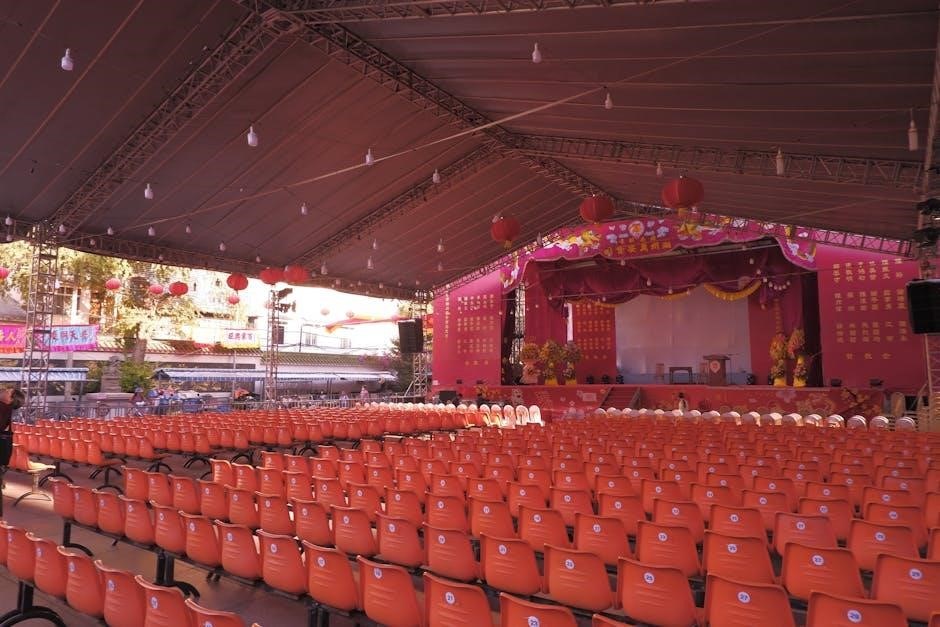
The 10×30 canopy party tent is a versatile and durable shelter designed for outdoor events. Its spacious interior accommodates up to 30 guests, making it ideal for weddings, parties, or corporate gatherings. Constructed with a sturdy metal frame and waterproof fabric, this tent offers excellent weather resistance. Features include adjustable legs, window panels, and a peaked roof for improved ventilation. Its sleek design enhances any setting while providing reliable protection from the elements. Easy to assemble and disassemble, it’s a practical solution for temporary event needs.
1.2 Importance of Following Assembly Instructions
Adhering to the 10×30 canopy party tent assembly instructions is crucial for safety, stability, and longevity. Proper assembly ensures the tent withstands weather conditions and supports its weight capacity. Misaligned parts or loose connections can lead to structural failure, posing risks to occupants. Following guidelines minimizes errors, preventing potential hazards like collapse or damage. Additionally, correct assembly prolongs the tent’s lifespan and maintains its aesthetic appeal. Always prioritize step-by-step instructions to guarantee a secure and reliable setup for your event.
1.3 Brief History of Party Tent Usage
Party tents have been used for centuries to provide shelter and elegance for outdoor gatherings. Originally made from animal skins and basic fabrics, they evolved into sophisticated structures with advancements in materials. By the 20th century, waterproof and portable designs became popular for events like weddings and festivals. Today, 10×30 canopy party tents are a staple for modern celebrations, offering durability, ease of assembly, and versatile designs to accommodate various needs. Their historical evolution reflects humanity’s ingenuity in creating functional and aesthetic solutions for outdoor events.

Parts and Tools Required for Assembly
The 10×30 canopy party tent includes a sturdy frame, waterproof canopy, fittings, stakes, and ropes. Essential tools like a hammer, screwdriver, and measuring tape are needed for assembly.
2.1 Detailed Parts List for 10×30 Canopy Tent
The 10×30 canopy tent includes a robust frame with poles, connectors, and fittings. The waterproof canopy, side panels, stakes, ropes, and anchor kits are also provided. Additional components like hip rafters, spreaders, and corner fittings ensure structural integrity. Hardware such as bolts, nuts, and washers are included for secure connections. A detailed parts list is essential for efficient assembly. Always verify all items are present before starting. Organize parts by category to streamline the process. Refer to the manufacturer’s manual for specific part descriptions and quantities.
2.2 Essential Tools Needed for Assembly
To assemble the 10×30 canopy tent, gather essential tools like a wrench or socket wrench for tightening bolts, a 6-foot ladder for reaching high areas, and a rubber mallet for securing fittings gently. A measuring tape ensures accurate alignment, while a utility knife is handy for cutting ropes. A wheelbarrow or trolley aids in transporting heavy parts. Proper lighting, such as a work light, is crucial for visibility. Wear gloves for hand protection and use a tarp or ground cover to protect the tent fabric. Spring clamps can hold parts in place, and a pencil or marker is useful for marking positions. Organizing these tools beforehand streamlines the assembly process.
2.3 Organizing Parts Before Assembly
Organizing parts before assembling the 10×30 canopy tent is crucial for efficiency. Start by laying out all components on a clean, dry surface. Use the provided parts list to verify each item is present. Group similar parts together, such as frame poles, roof panels, and hardware. Label each group to avoid confusion. Store small hardware like bolts and screws in labeled containers or ziplock bags. Cross-reference the manual to ensure parts match their descriptions; A well-organized setup reduces assembly time and minimizes errors, ensuring a smooth and stress-free process. Proper organization also helps prevent misplaced or lost components.
Safety Precautions and Guidelines
Ensure a safe assembly process by following essential safety tips. Avoid setup during harsh weather, and never use open flames near the tent. Use common sense and stay alert to prevent accidents. Keep children away from the assembly area, and wear protective gear if necessary. Always follow the manufacturer’s instructions to secure the tent properly. Regular inspections and proper storage are key to maintaining safety and longevity. Stay vigilant and avoid risky behaviors to ensure a secure and enjoyable event environment.
3.1 General Safety Tips for Tent Assembly
Always prioritize safety when assembling a 10×30 canopy party tent. Ensure the area is clear of obstacles and avoid setup during strong winds or rain. Never use open flames, candles, or cooking equipment near the tent. Stay alert and avoid distractions while assembling. Wear protective gear like gloves to prevent injuries. Keep children and pets away from the assembly zone. Follow the manufacturer’s instructions carefully and inspect all parts for damage before use. Proper anchoring is crucial to prevent the tent from collapsing; Stay vigilant and take regular breaks to avoid fatigue during the process.
3.2 Weather Considerations for Setup
Weather conditions play a crucial role in the safe assembly of a 10×30 canopy party tent. Avoid setting up in strong winds, heavy rain, or extreme temperatures. Choose a dry, flat surface and ensure the area is clear of debris. If rain is forecasted, apply a waterproof coating to the fabric. Use anchoring kits to secure the tent firmly, especially in windy conditions. Always check the weather forecast before and during the event to ensure stability. Loose fabrics can flap dangerously in the wind, so tighten all panels properly. Monitor weather changes to prevent damage or collapse during use.
3.3 Common Mistakes to Avoid During Assembly
When assembling a 10×30 canopy party tent, avoid common mistakes that can compromise safety and stability. Never skip the inventory check or ignore weather conditions like strong winds or rain. Ensure all parts are securely tightened and avoid over-tightening, which can damage fittings. Properly align poles and frames to prevent uneven structures. Do not skip anchoring the tent with stakes and ropes, as this is critical for stability. Additionally, avoid assembling the tent near open flames or sparks, and always follow the manufacturer’s instructions. These oversights can lead to structural failure or safety hazards during use.
Step-by-Step Assembly Instructions
Start by unpacking and organizing all parts. Assemble the frame, attach rafters, and secure the roof. Follow each step carefully to ensure a safe and stable setup.
4.1 Unpacking and Inventory Check
Begin by carefully unpacking the tent components, ensuring all parts are included. Check for the frame, roof, side panels, stakes, ropes, and hardware. Organize the parts logically to streamline assembly. Review the parts list to confirm nothing is missing. Pay attention to labeled items like hip rafters, crown fittings, and spreaders. Verify the condition of each component for damage. This step ensures a smooth assembly process and prevents delays. Cross-reference with the manual to identify any discrepancies or missing items before proceeding.
4.2 Assembling the Tent Frame
Start by connecting the tent legs and corner fittings securely. Attach the hip rafters to the 3-way crown fitting, ensuring proper alignment. Next, add the top spreaders and rafters, followed by side tees and spreaders. Use the provided hardware to tighten all connections firmly. Make sure the frame stands upright and is evenly balanced. Double-check the alignment of each part before moving forward. This step forms the structural foundation of the tent, so accuracy is crucial for stability and safety. Proceed methodically to avoid misalignment or loose joints.

4.3 Attaching the Roof and Side Panels
Begin by laying the roof panels over the assembled frame, ensuring proper alignment. Secure the panels using the provided Velcro straps and hooks. Tighten these firmly to prevent any slack. Next, attach the side panels by zipping or snapping them into place, starting from the front and moving to the back. Ensure all corners are snug to avoid gaps. Use the ropes and stakes to pull the panels taut, providing structural integrity. Double-check all attachments for tightness and alignment before proceeding. This step ensures the tent is weatherproof and securely covered.
4.4 Securing the Tent with Stakes and Ropes
Insert stakes into the ground at each corner and along the sides, angling them away from the tent for maximum stability. Use the ropes provided, tying them to the stake loops and wrapping them around the stakes. Tighten the ropes firmly to ensure the tent is taut and level. Repeat this process for all sides, ensuring even tension. Finally, check all ropes and stakes to confirm they are secure, providing a stable and durable structure for your event. This step is crucial for ensuring the tent remains upright and safe in various weather conditions.
4.5 Final Adjustments and Tightening
After securing the tent, inspect all areas to ensure the fabric is taut and evenly spread. Tighten any loose ropes or stakes for maximum stability. Check the roof and side panels for proper alignment and adjust as needed. Walk around the tent to verify that all connections are secure and the structure is level. Make final tightening adjustments to the frame and fabric, ensuring no slack remains. This step ensures the tent is stable, visually appealing, and ready for use in various weather conditions. Proper tightening is essential for long-term durability and safety.
4.6 Verifying the Structure’s Stability
Once the tent is fully assembled, perform a thorough stability check. Walk around the structure to ensure all parts are secure and properly aligned. Test the tent’s resistance to light wind by gently shaking the frame. Verify that all stakes are firmly anchored and ropes are tightly secured. Check the roof and walls for any sagging or loose fabric. Ensure the tent stands upright and even, with no leaning or wobbling. A stable structure guarantees safety and durability, especially in windy or rainy conditions. This final check ensures your tent is ready for safe and reliable use.
Maintenance and Upkeep of the Party Tent
Regular cleaning, proper storage, and inspections ensure the tent’s durability. Remove dirt, store in a dry place, and check for damage to maintain its quality and safety.
5.1 Cleaning the Tent Fabric and Frame
Regular cleaning is essential to maintain the tent’s condition. Use a mild detergent and water to scrub the fabric gently with a soft-bristle brush. Avoid harsh chemicals or abrasive materials that could damage the material. For the frame, wipe down metal parts with a damp cloth and mild soap. Rinse thoroughly to remove any soap residue. Allow the tent to air dry completely before storing to prevent mold or mildew. Cleaning ensures longevity and keeps your tent looking its best for future events.
5.2 Storing the Tent Properly
Proper storage is crucial to maintain your tent’s condition. After cleaning and drying, store the tent in a dry, well-ventilated area away from direct sunlight to prevent fading. Use the provided storage bag or a durable container to keep all parts organized. Avoid folding the fabric when wet, as this can lead to mold or mildew. Ensure the frame is clean and dry before storing to prevent rust. Secure the tent tightly to prevent movement during storage. Proper storage extends the lifespan of your 10×30 canopy party tent and ensures it remains ready for future use.
5.3 Regular Inspections for Damage
Regular inspections are essential to ensure the longevity and safety of your 10×30 party tent. Check the fabric for tears, holes, or signs of mold. Inspect the frame for rust, dents, or loose connections. Verify that all hardware and fasteners are secure and functioning properly. Look for wear and tear on stitching and seams. Perform these checks before and after each use, as well as during storage. Address any damage promptly to prevent further issues. Regular inspections help maintain the tent’s structural integrity and ensure it remains safe and reliable for future events.
Disassembly and Storage Instructions
Detach roof and side panels, fold the frame carefully, and secure all parts. Store in a dry, protective bag to prevent damage and extend lifespan.
6.1 Steps to Dismantle the Tent Safely
Start by removing the roof and side panels, ensuring all fabric is detached from the frame. Carefully lower the tent structure and disassemble the poles. Store each part securely to prevent damage and extend the tent’s lifespan. Always follow the manufacturer’s guidelines for safe disassembly to avoid accidents and maintain the tent’s integrity.
6.2 Folding and Packing the Tent
Folding the tent neatly is essential for compact storage. Lay the fabric flat and fold it evenly, ensuring no creases or wrinkles. Use the provided storage bags for poles and fittings. Keep all components organized to prevent loss. Secure the fabric with straps to maintain shape and protect from moisture. Proper folding and packing ensure the tent remains in good condition for future use and makes reassembly easier.
6.3 Storage Tips to Prevent Damage
Store the tent in a dry, cool place, away from direct sunlight and moisture. Use breathable storage bags to prevent mold and mildew. Avoid stacking heavy objects on the tent. Keep all parts, including poles and fittings, in labeled containers. Regularly inspect stored items for damage or wear. Ensure the tent is completely dry before storage to prevent rust or corrosion. Proper storage extends the lifespan of your 10×30 canopy tent and ensures it remains ready for future events.

Tips and Tricks for Successful Assembly
Plan ahead, organize parts, and follow instructions carefully. Use a helper for efficiency and safety. Ensure the ground is level before assembling the tent frame. Tighten all connections securely to maintain structural integrity. Avoid over-tightening to prevent damage. Use anchoring kits for stability. Regularly inspect hardware for wear. Keep tools handy for quick adjustments. Follow safety guidelines to ensure a smooth setup process. These tips will help you assemble your 10×30 canopy tent efficiently and effectively. Proper planning and attention to detail ensure a successful installation. Always follow manufacturer’s instructions for best results.
7.1 Planning the Assembly Process
Planning is crucial for a smooth assembly of your 10×30 canopy tent. Start by reviewing the instructions thoroughly and gathering all necessary tools and parts. Choose a flat, dry area free of obstacles. Ensure proper ventilation and avoid assembling in harsh weather. Assign roles if working with a team to streamline the process. Set aside enough time to complete the setup without rushing. Familiarize yourself with the sequence of steps to avoid confusion. A well-planned approach ensures efficiency and reduces the risk of errors during assembly. This preparation will make the process safer and more manageable. Stay organized and patient for the best results.
7.2 Using Anchoring Kits for Stability
Using an anchoring kit is essential for ensuring the stability and safety of your 10×30 canopy tent. Stake kits or weight plates should be used to secure the tent firmly to the ground, preventing it from shifting or toppling in windy conditions. Ensure all ropes are tightly tied to the anchors and evenly distributed for maximum stability. Follow the manufacturer’s instructions for proper anchoring techniques, especially on different ground types. This step is crucial for maintaining structural integrity and protecting your event from potential damage caused by unstable conditions. Proper anchoring also extends the lifespan of your tent.
7.3 Enhancing the Tent’s Aesthetic Appeal
To enhance your 10×30 canopy tent’s visual appeal, consider adding decorative elements like string lights, fabric drapes, or themed accessories. Properly aligning the roof and side panels ensures a sleek, professional look. Use matching colors for ropes and stakes to maintain a cohesive design. Add landscaping around the tent, such as plants or flowers, to blend it seamlessly with the surroundings. For events, incorporate lighting or banners to match the occasion. A well-organized and visually appealing tent creates a welcoming atmosphere for guests and elevates the overall event experience. Attention to detail makes your tent stand out.
Successfully assembling your 10×30 canopy tent ensures a durable, versatile shelter for events. Proper setup enhances safety and longevity, making your gatherings memorable and stress-free.
8.1 Summarizing Key Assembly Points
Assembly of the 10×30 canopy tent requires careful unpacking, inventory checks, and systematic frame construction. Attach roof and side panels securely, ensuring all connections are tight. Stake and rope the tent firmly for stability. Double-check all fittings and adjustments for safety. Follow instructions precisely to avoid errors. Proper setup ensures durability and weather resistance, making your event preparation hassle-free and enjoyable. Always verify structural stability before use to guarantee safety for everyone involved.
8.2 Encouraging Proper Maintenance
Regular maintenance ensures the longevity and safety of your 10×30 canopy tent. Clean the fabric and frame promptly after use to prevent dirt buildup. Store the tent in a dry, secure location to avoid mold and damage. Inspect the tent before and after each use for signs of wear or damage. Address any issues immediately to prevent further deterioration. Proper care and storage will extend the lifespan of your tent, ensuring it remains a reliable choice for future events and gatherings.
8.3 Final Safety Reminders
Always prioritize safety when assembling and using your 10×30 canopy tent. Avoid setting up in extreme weather conditions like heavy rain or strong winds. Ensure the tent is securely anchored using stakes and ropes. Never use open flames or heaters inside the tent. Regularly inspect the structure for stability and damage. Follow all manufacturer guidelines and take necessary precautions to ensure a safe and enjoyable experience for everyone involved. Safety should remain a top priority throughout the entire process, from assembly to disassembly.
Resources for Further Assistance
For additional support, refer to the manufacturer’s customer service, online tutorials, and community forums. These resources provide troubleshooting tips, video guides, and expert advice for a seamless assembly experience.
9.1 Manufacturer’s Customer Support
For assistance with your 10×30 canopy party tent, contact the manufacturer’s customer support team. They provide detailed guidance, troubleshooting, and solutions to assembly-related queries. Reach them via phone, email, or live chat through their official website. Ensure to have your model number and purchase details handy for quicker resolution. Many manufacturers also offer FAQs and video tutorials on their websites to address common issues. Always refer to official resources to avoid misinformation and ensure compliance with warranty terms. Their support team is available to help you achieve a successful and stress-free assembly process.
9.2 Online Tutorials and Videos
Online tutorials and videos provide step-by-step guidance for assembling your 10×30 canopy party tent. Platforms like YouTube and manufacturer websites offer detailed walkthroughs, covering topics such as frame assembly, fabric attachment, and stake securing. These visual aids are especially helpful for first-time assemblers. Many videos include troubleshooting tips and highlight common mistakes to avoid. They often feature real-time demonstrations, making complex steps easier to understand. For a smooth setup, consider watching these tutorials to ensure accuracy and confidence in your assembly process.
9.3 Community Forums for Q&A
Community forums are invaluable resources for addressing questions and concerns about 10×30 canopy party tent assembly. Online forums and discussion groups allow users to share experiences, ask questions, and receive advice from experienced individuals. Many threads cover common assembly challenges, offering practical solutions and tips. These platforms foster collaboration, enabling users to learn from others who have successfully assembled similar tents. Whether troubleshooting specific issues or seeking general guidance, community forums provide a wealth of peer-to-peer support to ensure a smooth assembly process.

Frequently Asked Questions (FAQs)
This section addresses common queries about 10×30 canopy tent assembly, including issues like missing parts, stability concerns, and fabric attachment problems, providing clear solutions for each.
10.1 Common Issues During Assembly
Common challenges during 10×30 canopy tent setup include mismatched pole connections, loose fittings, and difficulty attaching fabric panels. Ensure all parts are accounted for and correctly aligned. Tightening all bolts after assembly is crucial for stability. If issues persist, refer to the manufacturer’s instructions or contact customer support for assistance. Proper preparation and careful following of steps can minimize these problems, ensuring a secure and functional setup for your event.
10.2 Solutions to Typical Problems
For mismatched poles, cross-reference the parts list and ensure correct alignment. Loose fittings can be tightened with provided tools. If fabric panels don’t attach easily, check for proper frame assembly and gently guide the fabric into place. Consult the instruction manual or online tutorials for visual guidance. Contact customer support if issues persist. Regularly inspect and maintain hardware to prevent recurring problems. Proper troubleshooting ensures a sturdy and reliable tent structure for your events.
10.3 Addressing Unique Setup Challenges
For uneven ground, use adjustable legs and leveling tools to ensure stability. In windy conditions, secure the tent with additional anchors and weights. If missing parts are identified, contact the manufacturer promptly. Custom configurations may require extra support structures, so refer to the manual or seek professional advice. Addressing unique challenges ensures a safe and successful assembly, adapting the tent to various environments and ensuring durability for long-term use and enjoyment.

Troubleshooting Common Assembly Problems
Troubleshooting common assembly problems involves diagnosing frame issues, straightening bent poles, and ensuring fabric is securely attached. Addressing these challenges ensures a stable and secure structure.
11.1 Diagnosing Frame Assembly Issues
Diagnosing frame assembly issues begins with identifying misaligned poles, loose connections, or bent parts. Inspect each fitting and ensure all pieces are securely attached. Check for damaged or missing components, as these can cause instability. If a pole doesn’t fit properly, verify its correct position in the assembly sequence. Consult the instruction manual or manufacturer’s guide to confirm proper alignment and connections. Addressing frame issues early prevents structural problems and ensures a safe setup. Always double-check the frame’s stability before proceeding with fabric attachment.
11.2 Resolving Fabric Attachment Problems
Fabric attachment issues often arise from misalignment or improper tightening. Start by ensuring the fabric is correctly oriented and evenly spread over the frame. Check for loose or over-tightened straps, as this can cause wrinkling or tearing. Inspect the fabric for any tears or holes that may require patching. If the fabric sags, adjust the frame’s stability or tighten the ropes. Ensure all Velcro straps and clips are securely fastened. Refer to the instruction manual for specific attachment points. Regularly inspect and clean the fabric to prevent damage and ensure a smooth assembly process.
11.3 Fixing Stability and Structural Concerns
Ensure the tent is on level ground to maintain stability. Use anchoring kits, stakes, and ropes to secure it firmly. Tighten all frame connections and check for loose parts. If the tent sags, adjust the ropes or tighten the fabric. Avoid setting up in strong winds or rain, as this can compromise the structure. If stability issues persist, recheck the frame assembly and ensure all parts are properly aligned. Regular inspections and adjustments will help maintain the tent’s structural integrity and ensure a safe setup.