Pfister shower valves are renowned for their exceptional quality, offering sleek designs and reliable performance. Proper installation ensures optimal functionality, safety, and longevity of your shower system.
1.1 Overview of Pfister Shower Valves
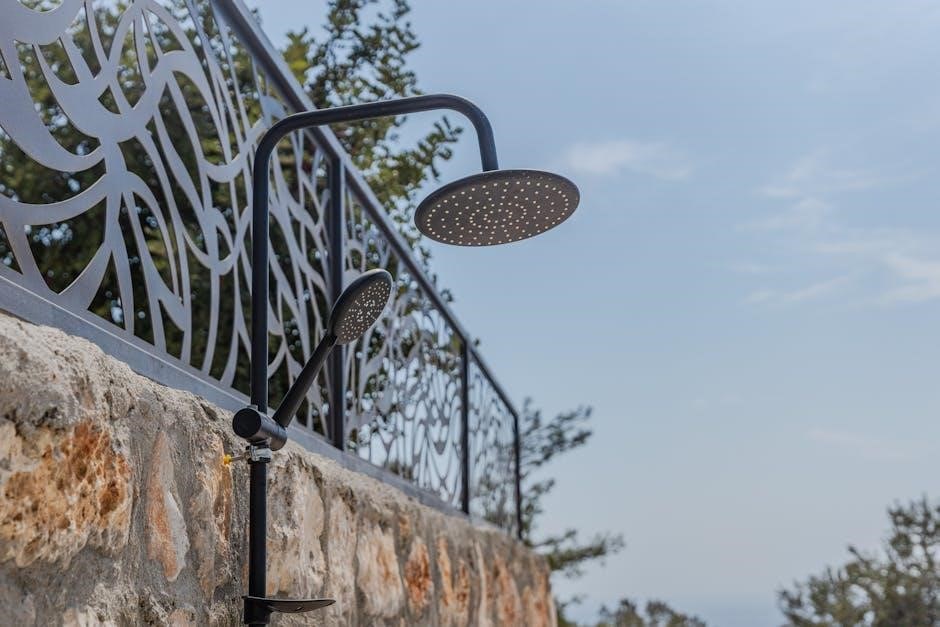
Pfister shower valves are high-quality plumbing fixtures designed for durability and performance. Known for their sleek designs and innovative features, these valves offer precise temperature control and water flow management. They come in various styles, including single-handle, dual-handle, and pressure-balancing models, catering to different bathroom aesthetics and functional needs. Pfister valves are built with advanced cartridges that ensure smooth operation and minimize leaks. Many models feature water-saving technologies, making them eco-friendly while maintaining excellent performance. Available in a range of finishes, such as brushed nickel, chrome, and oil-rubbed bronze, Pfister shower valves seamlessly integrate with modern or traditional bathroom designs. Their reputation for reliability and style makes them a popular choice for homeowners and professionals alike.
1.2 Importance of Proper Installation
Proper installation of Pfister shower valves is crucial for ensuring optimal performance, safety, and longevity. Incorrect installation can lead to leaks, water damage, or uneven water temperature control, which may result in costly repairs. A well-installed valve ensures smooth operation, prevents mineral buildup, and maintains water efficiency. Additionally, proper installation enhances safety by preventing scalding or freezing temperatures. It also preserves the warranty, as manufacturers often require adherence to specific installation guidelines. Improperly installed valves may void the warranty, leaving homeowners with additional expenses. Following the manufacturer’s instructions closely guarantees a reliable and long-lasting shower system. This step is essential for enjoying the full benefits of Pfister’s high-quality shower valves.
Tools and Materials Needed
Essential tools include adjustable wrench, screwdriver, and pliers. Materials needed are Teflon tape, mounting screws, and water supply lines. Ensure all parts are compatible with your Pfister model.
- Adjustable wrench
- Screwdriver
- Pliers
- Teflon tape
- Mounting screws
- Water supply lines
2.1 Essential Tools for Installation
To ensure a smooth installation, gather the necessary tools in advance. An adjustable wrench is crucial for tightening and loosening fittings. A screwdriver (both Phillips and flat-head) is needed for handle and trim installation. Pliers can assist with gripping small parts, while Teflon tape is essential for sealing threaded connections to prevent leaks. Additionally, a utility knife may be handy for cutting tubing or removing old adhesive. Ensure all tools are readily accessible to avoid delays. If you’re dealing with older or corroded parts, a breaker bar or penetrating oil might be necessary. Always refer to your Pfister installation manual for specific tool recommendations tailored to your model.
- Adjustable wrench
- Phillips screwdriver
- Flat-head screwdriver
- Pliers
- Teflon tape
- Utility knife
Proper tools ensure a professional-grade installation.
2.2 Required Materials and Parts

Installing a Pfister shower valve requires specific materials to ensure a successful and leak-free setup. The primary component is the Pfister shower valve itself, which may come as a trim kit or a complete system. Additional parts include the handle, escutcheon (trim plate), and any necessary adapters. For plumbing connections, PEX tubing or copper water supply lines are essential, along with fittings to connect to the valve. A drain assembly kit may also be needed if installing a new shower system. Ensure you have Teflon tape for sealing threaded connections and mounting hardware (e.g., screws, wall anchors) for securing the valve to the wall; Double-check the installation manual for any model-specific parts or requirements.
- Pfister shower valve
- Handle and trim kit
- Water supply lines
- Fittings and adapters
- Teflon tape
- Mounting hardware
Having all materials on hand ensures a seamless installation process.

Preparation Steps
Before installation, shut off the water supply and protect the area with a drop cloth. Ensure all tools and parts are accessible for a smooth process.
- Shut off water supply
- Protect surrounding areas
- Gather tools and materials
3.1 Shutting Off the Water Supply
Shutting off the water supply is the first critical step in any Pfister shower valve installation. Locate the main water shut-off valves, typically found near the water heater or meter. Turn these valves clockwise to stop water flow to the shower system. Open the shower faucet to drain remaining water from the lines. Double-check that no water flows out to ensure the supply is fully off. Taking these precautions prevents water damage and ensures a dry working environment. For additional safety, consider photographing the shut-off valve setup for future reference. Always wear protective gloves and eyewear when handling plumbing components.
- Locate main shut-off valves
- Turn valves clockwise to stop water flow
- Drain lines by opening the shower faucet
- Verify no water flows before proceeding
3.2 Removing the Old Shower Valve (If Applicable)
Before installing a new Pfister shower valve, remove the old one if it’s already installed. Start by accessing the valve, which may require removing decorative covers or handles. Disconnect the water supply lines using an adjustable wrench, taking care not to damage the pipes. Once disconnected, remove the mounting screws holding the valve in place. Gently pull the valve out of the wall, ensuring no debris remains. If the valve is stuck, use a gentle rocking motion to dislodge it. After removal, inspect the area for any leftover adhesive or mineral buildup and clean it thoroughly before proceeding with the new installation. Proper removal ensures a smooth and leak-free installation process.
- Disconnect water supply lines with an adjustable wrench
- Remove mounting screws using a screwdriver
- Gently pull the valve out of the wall
- Clean the area before installing the new valve
Installation Process
Installing a Pfister shower valve involves mounting the valve securely to the wall, connecting water supply lines, and installing the handle and trim. Follow step-by-step instructions carefully.
4.1 Mounting the Valve to the Wall
Mounting the Pfister shower valve to the wall is a critical step in the installation process. Begin by locating the valve’s mounting bracket and aligning it with the pre-drilled holes in the wall. Ensure the valve is centered and flush with the tile or wall surface for a professional finish. Secure the valve using the provided screws, tightening them firmly but avoiding over-tightening, which could damage the fixture. Use a spirit level to confirm the valve is perfectly horizontal and vertical. Double-check the alignment to ensure proper functionality and aesthetics. Once mounted, the valve should be stable and ready for connecting water supply lines and installing the handle and trim.
4.2 Connecting Water Supply Lines
Connecting the water supply lines to your Pfister shower valve is a straightforward process that requires attention to detail. Start by identifying the hot and cold water supply lines, typically marked by red and blue coloring, respectively. Attach the appropriate connectors or fittings to the valve’s inlet ports, ensuring they are securely fastened using a wrench. Apply Teflon tape to the threads for a watertight seal, taking care not to overtighten. Before proceeding, confirm that the water supply is turned off to prevent any leakage. Once connected, turn the water supply back on and test for leaks by running water through the shower system. Secure the lines with clips or brackets to prevent movement and ensure long-term stability.
4.3 Installing the Handle and Trim
Once the valve is securely mounted, install the handle by aligning it with the valve stem and ensuring proper orientation. Use an Allen wrench to tighten the handle’s setscrew firmly. Next, attach the trim kit over the valve, ensuring it is centered and flush with the wall. Secure the trim using the provided screws, tightening them evenly to avoid warping. Apply a small amount of Teflon tape to the trim’s mounting screws for a watertight seal. Finally, test the handle’s operation to confirm smooth rotation and proper alignment with the valve’s functions. This step completes the visible components of your Pfister shower valve installation, ensuring a polished and functional finish.

Troubleshooting Common Issues
Common issues include leaks, handle misalignment, and cartridge malfunctions. Check connections for tightness, adjust handle alignment, and clean or replace the cartridge if necessary for optimal performance.
5.1 Addressing Leaks During Installation
Leaks during Pfister shower valve installation can often be resolved by checking connections for tightness and ensuring all gaskets are properly seated. Apply plumber’s tape to threaded connections for a watertight seal. If leaks persist, inspect the valve’s O-rings or gaskets for damage and replace them if necessary. Clean or replace worn-out cartridge components, as debris or mineral buildup can cause leakage. After addressing the issue, turn on the water supply slowly and test the valve under pressure. If leaks continue, consult the installation manual or contact Pfister’s customer support for further assistance. Properly addressing leaks ensures long-term functionality and prevents water damage.
5.2 Resolving Handle Alignment Problems
If the handle is misaligned during installation, ensure the valve stem is properly seated and aligned with the handle. Loosen the handle’s mounting screws slightly and adjust its position to align correctly with the valve. Tighten the screws firmly but avoid over-tightening, which could damage the valve stem. If the handle feels loose or wobbly, check for proper installation of the handle’s retaining clip or screw. Ensure all internal components, such as the cartridge or stem, are correctly installed and aligned. Refer to the installation manual for specific adjustments. Proper alignment ensures smooth operation and prevents premature wear on moving parts. If issues persist, contact Pfister customer support for guidance or replacement parts.
Maintenance and Care
Regularly clean the Pfister shower valve with mild soap and water to prevent mineral buildup. Check for leaks and lubricate moving parts annually to ensure smooth operation and longevity.
6.1 Cleaning the Shower Valve
Regular cleaning of your Pfister shower valve is essential for maintaining its performance and appearance. Start by gently wiping the exterior with a soft cloth and mild soap solution to remove any dirt or mineral deposits. Avoid using harsh chemicals or abrasive materials that could damage the finish. For tougher stains or lime scale buildup, soak a cloth in a mixture of equal parts white vinegar and water, and apply it to the affected area. Let it sit for about 15 minutes before rinsing thoroughly with warm water. This method is effective and gentle, ensuring your valve remains in pristine condition. Additionally, drying the valve after cleaning prevents water spots and maintains its polished look. Regular maintenance not only enhances aesthetics but also prolongs the valve’s lifespan, ensuring optimal functionality over time. By incorporating this simple cleaning routine into your maintenance schedule, you can keep your Pfister shower valve looking like new and functioning flawlessly for years to come.
6.2 Lubricating Moving Parts
Lubricating the moving parts of your Pfister shower valve is crucial for maintaining smooth operation and preventing wear. Use a silicone-based lubricant, as it is water-resistant and suitable for plumbing fixtures. Apply a small amount directly to the valve stem or cartridge, ensuring even coverage. Avoid over-lubrication, as it can attract dirt. Gently wipe off any excess with a clean cloth. Regular lubrication, ideally every 6 to 12 months, helps maintain optimal performance. Before applying, clean the parts to remove any debris. Refer to Pfister’s maintenance guidelines for specific product recommendations. Proper lubrication enhances longevity and ensures the valve functions seamlessly. Regular maintenance is key to preventing future issues and keeping your shower valve operating smoothly.
Manufacturer Support and Resources
Pfister offers dedicated customer support at 1-800-732-8238 for installation inquiries. Their website provides detailed guides, videos, and troubleshooting tips to ensure a smooth installation process.
7.1 Contacting Pfister Customer Service
For assistance with Pfister shower valve installation, contact their dedicated customer service team at 1-800-732-8238. This team is available to address questions, identify specific models, and provide detailed installation instructions. Whether you need help with troubleshooting or require replacement parts, their support ensures a smooth process. Additionally, Pfister’s website offers extensive resources, including repair kits and troubleshooting guides, to resolve common issues. Proper installation is crucial for maintaining warranty coverage, so reaching out to their experts can prevent potential problems; Their customer service is committed to ensuring satisfaction and providing the necessary guidance for a successful installation experience.
7.2 Accessing Online Installation Guides
Pfister provides comprehensive online resources to simplify the installation process. Visit their official website to access detailed installation guides, including PDF manuals and video tutorials. These guides are model-specific, ensuring you receive accurate instructions for your particular shower valve. To find your model, enter the product number in the search bar on Pfister’s website. Additional resources include troubleshooting tips and parts diagrams, which can help resolve common issues. The website also offers filter options to narrow down results by product type or series. By utilizing these online tools, you can confidently navigate the installation process, ensuring a professional-grade result. Pfister’s commitment to customer support extends beyond physical products, providing virtual assistance for a seamless experience.
Proper installation and maintenance ensure long-term functionality and customer satisfaction. Pfister shower valves offer durability and style, backed by reliable support for a seamless experience.
8.1 Final Check and Testing
After completing the installation, conduct a thorough final check to ensure everything functions correctly. Turn on the water supply and inspect for leaks at all connections, including the valve, handles, and supply lines. Test the handle alignment to confirm smooth operation and proper water temperature adjustment. Check the flow rate and ensure the shower head and any additional features, like a hand shower, are working as expected. Verify that the valve is securely mounted to the wall and the trim is properly aligned. Double-check all connections for tightness and ensure no water escapes during operation. Finally, clean any debris or fingerprints from the valve and handle to ensure a professional finish. Proper testing guarantees long-term performance and customer satisfaction, aligning with Pfister’s commitment to quality and reliability.
8.2 Ensuring Long-Term Functionality
To ensure your Pfister shower valve performs optimally over time, regular maintenance is essential. Clean the valve and handle regularly to prevent mineral buildup and maintain a polished appearance. Lubricate moving parts periodically to guarantee smooth operation and prevent corrosion. Inspect the valve and connections annually for signs of wear or leaks, addressing any issues promptly. Consider replacing washers or O-rings if leaks develop. Always refer to Pfister’s maintenance guidelines for specific recommendations. By following these steps, you can extend the lifespan of your shower valve and uphold its performance. If you encounter any difficulties, Pfister’s customer service is available to provide assistance and ensure your installation remains trouble-free for years to come.